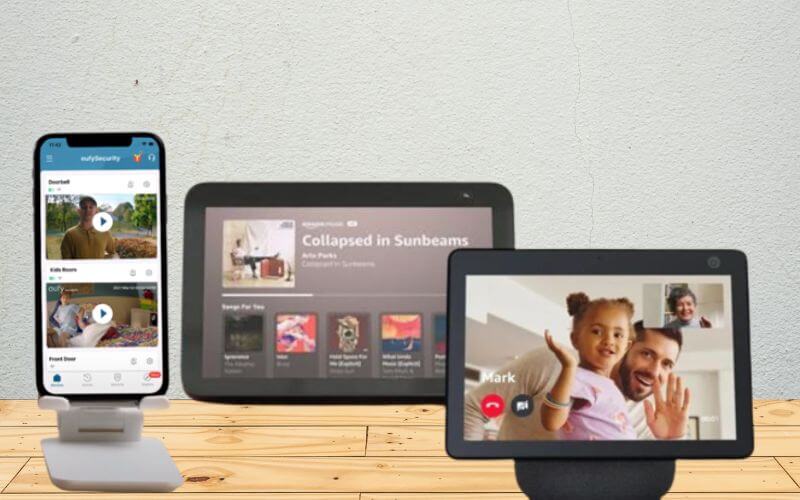
Eufy Camera is a smart home security system that uses wireless cameras to monitor and protect your home. It has motion detection and real-time alerts, so you can monitor any activity in and around your home. Now it also comes with the Eufy app that allows you to view live and recorded footage from anywhere. It also becomes a leading camera because it also easily works with Amazon Alexa. Here it also becomes vital to know how to add an Eufy camera to Alexa.
The system is designed to be easy to install and use, so you don’t have to be a tech expert to set it up. It also has night vision and two-way audio, so you can see and talk to anyone who is on your property, even when it’s dark out. It has facial recognition, which makes it easier to identify people who have visited your property.
Eufy cameras are renowned for their ease of installation and use. They also offer a wide range of features such as motion detection, night vision, two-way audio, and more. Additionally, they are cost-effective, making them an attractive option for home security. Here we can discuss the proper way for how to add Eufy camera to Alexa.
Method For How To Add Eufy Camera To Alexa
It is also necessary to download the Alexa App and Eufy app for how to add an Eufy camera to Alexa. There is also created an account to complete the process quickly. It is imperative to follow all the steps perfectly.
- On your mobile device or tablet, open the Amazon Alexa App.
- By logging in, you can access your account.
- The More button is located at the top of the screen.
- You can search for Eufy Security by clicking on Skills & Games and clicking on “Eufy Security ”.
- Enable Eufy Security by tapping on Enable To Use under “Eufy Security”.
- Alexa can access your Eufy app by entering your Eufy account credentials.
- The account will be successfully linked on another screen. Click the Close button.
- Alexa, use your camera after you click Discover Devices.
- Now Alexa discovered your Eufy cameras. Navigate to the Device to control them.
After this, you can use Alexa Setup to manage your Eufy camera with voice commands. It becomes easier to watch the live stream and receive notifications on your device. All the above steps are imperative for how to add Eufy camera to Alexa.
Alexa users sometimes complain that they don’t receive notifications when the camera is paired with Alexa. In general, this issue occurs when the Do Not Disturb mode is enabled, which prevents you from receiving all kinds of notifications. Here you can disable or turn off the Do Not Disturb mode with these few steps.
- On your phone, open the Alexa app.
- On the Devices page, click on “Echo & Alexa ”.
- Click on the device of your choice.
- You can turn off the notification by tapping “Do Not Disturb ”.
- You can turn off Do Not Disturb.
Get Now! How to Control Eufy Camera With Alexa Voice Assistant
It is well known that Alexa is a very popular voice assistant and the majority of people use this app to control their smart home devices. Eufy cameras are easy to control with your voice. To accomplish a task, you only need to memorize the voice commands. You can use the below commands to view the live stream from the Eufy camera.
- “Alexa, show me [Eufy device name]”.
- “Alexa, show my [Eufy device name]”.
- “Alexa, show the [Eufy device name]”.
- “Alexa, show [Eufy device name]”.
- “Alexa, stop”.
- “Alexa, go home”.
Change the Eufy Camera Name on Alexa
If you own multiple cameras and control them with Alexa, it’s imperative to distinguish between them by following this step. You can quickly change the name of your device in the Alexa app.
- You can access Alexa through the app.
- In the lower right corner, tap devices.
- Go to the option on top of the Echo Show screen and select cameras.
- Choose the Eufy Cam you wish to edit.
- You can find the gear icon on the right side of your screen.
- Your camera can be renamed by tapping Edit Name.
Delete Your Eufy Account from Alexa
Eufy accounts can be removed from Alexa when the device owner no longer wants to use it. It is a simple process so you can complete it by following these steps:
Steps To Delete Your Eufy Account from Alexa
- Launch the Alexa App.
- You can then tap “Your Skills”.
- Choose the “EufySecurity Skill”.
- Go to the settings for “EufySecurity Skill”.
- You can manage smart home devices by selecting “Manage Smart Home Devices.”
- By selecting the Eufy camera, you can select the linked devices.
- You can delete the camera by clicking the “Trash Bin” icon.
- Delete the camera from the device list and re-add it.
How Do I Disconnect My Eufy Camera From Alexa?
Sometimes users want to disconnect their Eufy camera from Alexa. There may be a problem with your camera, a full reset is needed, or you want to switch cameras. It can solve the smallest problems you encounter with this smart device if you know how to disconnect it. They can easily disconnect them and re-add them by following the simple steps.
Steps to Disconnect My Eufy Camera From Alexa
- Launch the “Alexa” app, and click on “your skills”.
- Enter “Settings” by tapping on “EufySecurity skill”.
- Here you select “Manage Smart Home Devices”.
- You can remove a Eufy camera device by selecting it.
- Here you can delete the Eufy device by tapping the “trash bin” icon.
- You can also re-add the device again with Alexa.
It may be necessary to reset the device or check your internet connection if the device does not disconnect. All the process of how to add Eufy camera to Alexa or discount and delete from Alexa is simple and it takes a few minutes. You can quickly complete it by following the given steps.
Final Words
You can easily use the Eufy camera with Alexa. It is also crucial to follow all the steps for how to add Eufy camera to Alexa. When you read and follow all the instructions carefully it becomes easier for you to use an amazing device Eufy camera with Alexa.